
What’s better than a table with wheels? A table that you can drive around! This tutorial will teach you how to build your very own Mini Robotic Table, a project that was conceived and designed by one of my students (she was 10 when we started).
We built this table because, in the words of my student:
“I wanted to build something and I thought of a table and I thought of robotics and I smooshed them together. I like woodworking and I like robotics and I wanted to do something with the both of them.
We started w/ a full size table but that took a lot of time and money so we decided to make a tiny version, which is a prototype to the big one.”
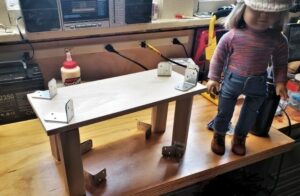
We sized this mini table for American Girl Doll height (an American Girl doll is 18″ tall so we made the table to be 9″ tall), but you can adjust and modify depending on your needs. The most important thing to keep in mind is table weight, as a larger table requires larger motors and more battery power.
Difficulty level: Intermediate
Estimated build time: a few days to a week
Cost: ~ $75 – $100
Adult supervision required (lots of sharp and powerful tools involved)
Supplies
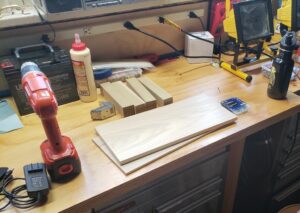
Materials
- Wood
- Table top: 8″ x 16″ (width x length)
- Legs: 1.5″ x 1.5″ x 8″ (width x length x height)
- Table Shelf: 8″ x 14″
- Brackets (8)
- Screws (28)
- For brackets: 1.25″ screws
- Axle, metal
- We used the metal rod from an old (aka broken) french press
- 4xAA Battery case and (4) AA batteries
- Continuous rotation servos (2)
- Small screws to hold wheels onto servo (2)
- Radio controller and receiver
- Servo Wheels (2)
- Caster Wheels (3)
- we used the same wheels as for the servo motors, but attached them to an axle instead of a servo.
Tools
- Hot glue dispenser and glue sticks
- Power Drill
- Drill Bits
- Screwdriver Bits
- Saw
- Or get pieces cut at your local hardware store
- Sandpaper
- Glue
- Electrical Tape or heat shrink tube
- Safety glasses
- Dust mask
- Scissors
- Measuring tape
- Level
- Clamps
- Optional:
- Duct Tape
- Velcro
- Zip Ties
Tips, Tricks, & Extra Information (Please read before building!)
Before you build anything, read the full project instructions first!
Helpful info to have before you start this project:
1. Be prepared for drying time
2. How to use power tools and know safety rules.
Safety rules: put hair up, eye protection, roll up sleeves, no loose clothes, no jewelry that could get in the way, always have a second person in the room especially an adult if you are younger, dust mask.
3. Be prepared w/ the materials and tools you’ll need.
4. Document in a notebook as you work for reference later.
5. Find a radio controller that comes with a receiver. It is easier to put together the electronics if you get a controller and receiver together because it will take a lot more time to figure out which receiver will work with a particular controller, so get a controller that comes w/ the right receiver.
RC controllers can be very expensive, and other ones are super cheap and don’t work well. Read the entire description for the controller and receiver that you are interested in. The way we figured it out was by finding three options: one that was expensive, one that was in the middle, and one that was cheaper. We used our budget to help figure out the best option, and ended up selecting the option that was in the middle.
Build the Table!
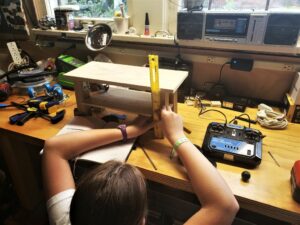
Gather your woodworking tools, wood pieces, and brackets (see Supplies section for sizes). Remember to measure two or three times before drilling, gluing, and/or cutting 🙂
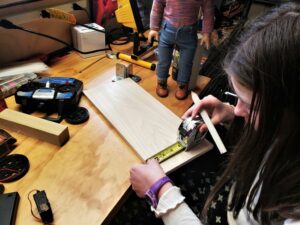
Step 1: Determine placement of legs and brackets and mark all bracket holes with a pencil.
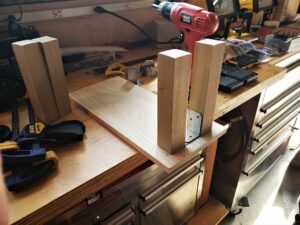
We used 2 brackets for each leg and 4 screws for each bracket, except for two brackets that overlap in between the legs.
It is helpful to use a tape measure to get placement as accurate as possible.
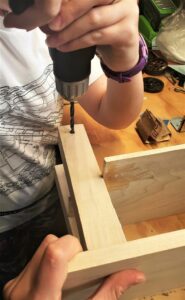
Step 2: Attach legs to the tabletop with brackets and screws.
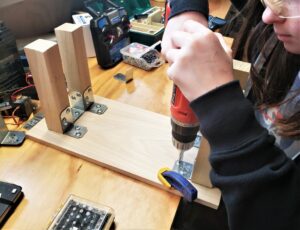
A. Drill small holes in the tabletop and table legs to avoid cracking the wood. (See photo)
B. Attach two brackets to each leg.
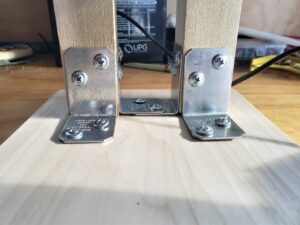
C. Attach legs with brackets to table.
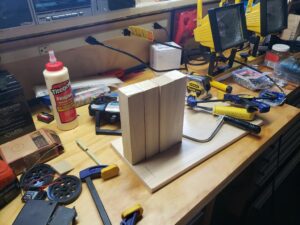
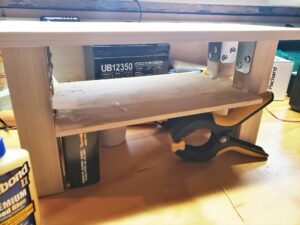
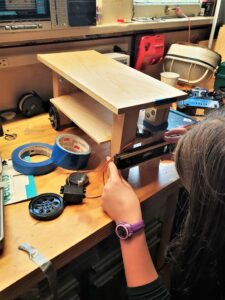
Step 3: Add the table shelf!
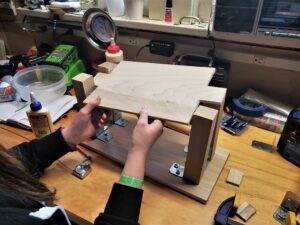
We cut ours to fit between the legs and attached with wood glue.
Tip: Add an object under the shelf while it is drying so the shelf does not move.
Step 4: Sand the table where needed.
Step 5: Measure the height of the wheels and include in the total table height.
Connect the Electronics!
1. Set up the radio controller and receiver.
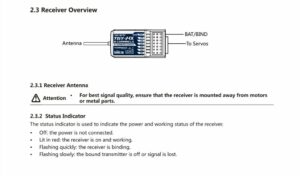
Bind the receiver to the controller as shown in the instructions that come with the controller that you chose.
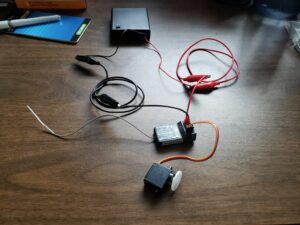
2. Connect the battery case to the radio receiver.
Connect the battery pack to the pins that say “B/VCC” (black wire goes on the outside of the receiver).
For this table size and weight, four AA batteries are enough to power the receiver and the two continuous servo motors. If you build a bigger table, you’ll need larger motors and more battery power.
3. Do a quick test to figure out which receiver input plugs work best for driving your table with the controller.
For the test, do the following:
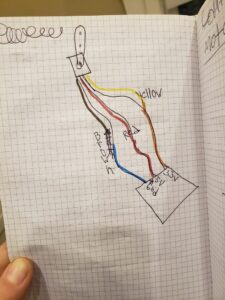
If you are using the same radio controller and receiver, we recommend using receiver channels 2 and 3.
A. Connect one motor to the first channel on the receiver. Align the servo wires with the receiver channel as shown in the photo above.Then move the controls on the controller, observe when and how the motor moves, and record your findings.
B. Move the motor to the next receiver channel and repeat Step 2A. Do for all channels on the receiver.
C. Decide which channels work best to drive your robotic table!
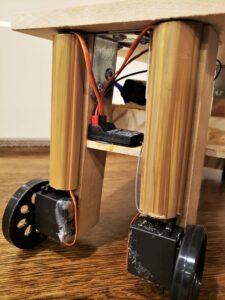
Build the Drive Train and Attach Wheels!
The drive train is how we connect the motor and wheels to the table.
Step 1: Attach the wheels to the servos.
We attached the wheels with screws, but we had to find screws that fit and held the wheels on tight. We also had to drill out a bit of the wheel where the hole is so the screws could fit through. You may need to do a bit of testing to find the proper screws.
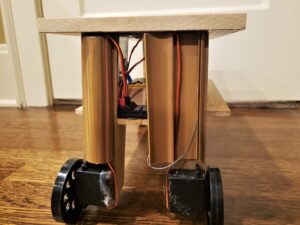
Step 2: Figure out placement of the servos and wheels. Use tape to hold in place while you test.
Use a level to make sure that when you attach the wheels the table is not all wonky. Measure how tall the servo with wheels are going to be before you attach them and before you drill into the wood. If you do not measure them, the table might be too tall and disproportionate.
Step 3: Attach the front castor* wheels to the table using the metal axle.
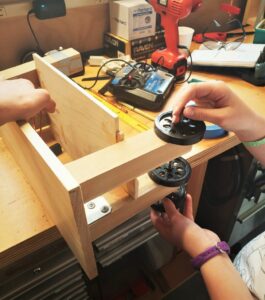
A. Measure and mark the location of the axle so that the castor wheels are even with the back wheels.
B. Drill holes into the front table legs and push the axle through, adding wheels as you go.
C. Secure the castor wheels in place by adding hot glue or grommets** on either side of the wheels, leaving about a 1/2″ (1cm) gap so that the wheels can rotate freely.
*The front wheels are called “castor” wheels because they are not connected to the motor.
** A grommet is circular rubber stopper, sort of like a rubber band, that prevents the wheels from sliding off.
Step 4: Secure the servo motors with epoxy or another strong adhesive.
Note: We recommend doing this step after testing the whole table as the servo motors will be stuck once the epoxy dries.
Test, Drive, & Decorate!
Power up the radio receiver and controller and test out your robo table! It might take a few practice trials to get a feel for driving the table.
Once you’re sure the table is working, add some hot glue (or epoxy) to hold wires in place and prevent the electronics from getting disconnected.
Decorate your table with markers, paint, stickers, fabric… whatever your creativity compels you to do!
If you want to see optional upgrades, check the next slide. Otherwise….
You’re done! Enjoy driving your robo table, maybe to give your pets a lil’ exercise or to deliver you or a friend food when you are watching a movie. Share your ideas and creations with us, we’d love to see!
Optional Upgrades
Battery holder!
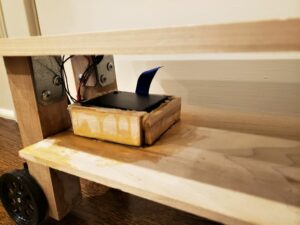
We made a battery holder using wood, felt, ribbon, and wood glue. We measured the battery box and cut small pieces of wood to make a box without a top. We used the felt to cushion the battery box and keep it in place, and the ribbon to more easily pull the battery box out.
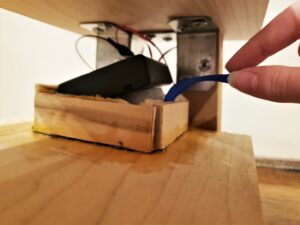
Wire Tubing
We purchased some wood-colored cord cover and cut it to fit the sides of the table legs to conceal the servo wires.
Brakes!
Design your own braking system, or stay tuned for separate tutorial on how we tackle this!
One thought on “Mini Robotic Table”
Comments are closed.