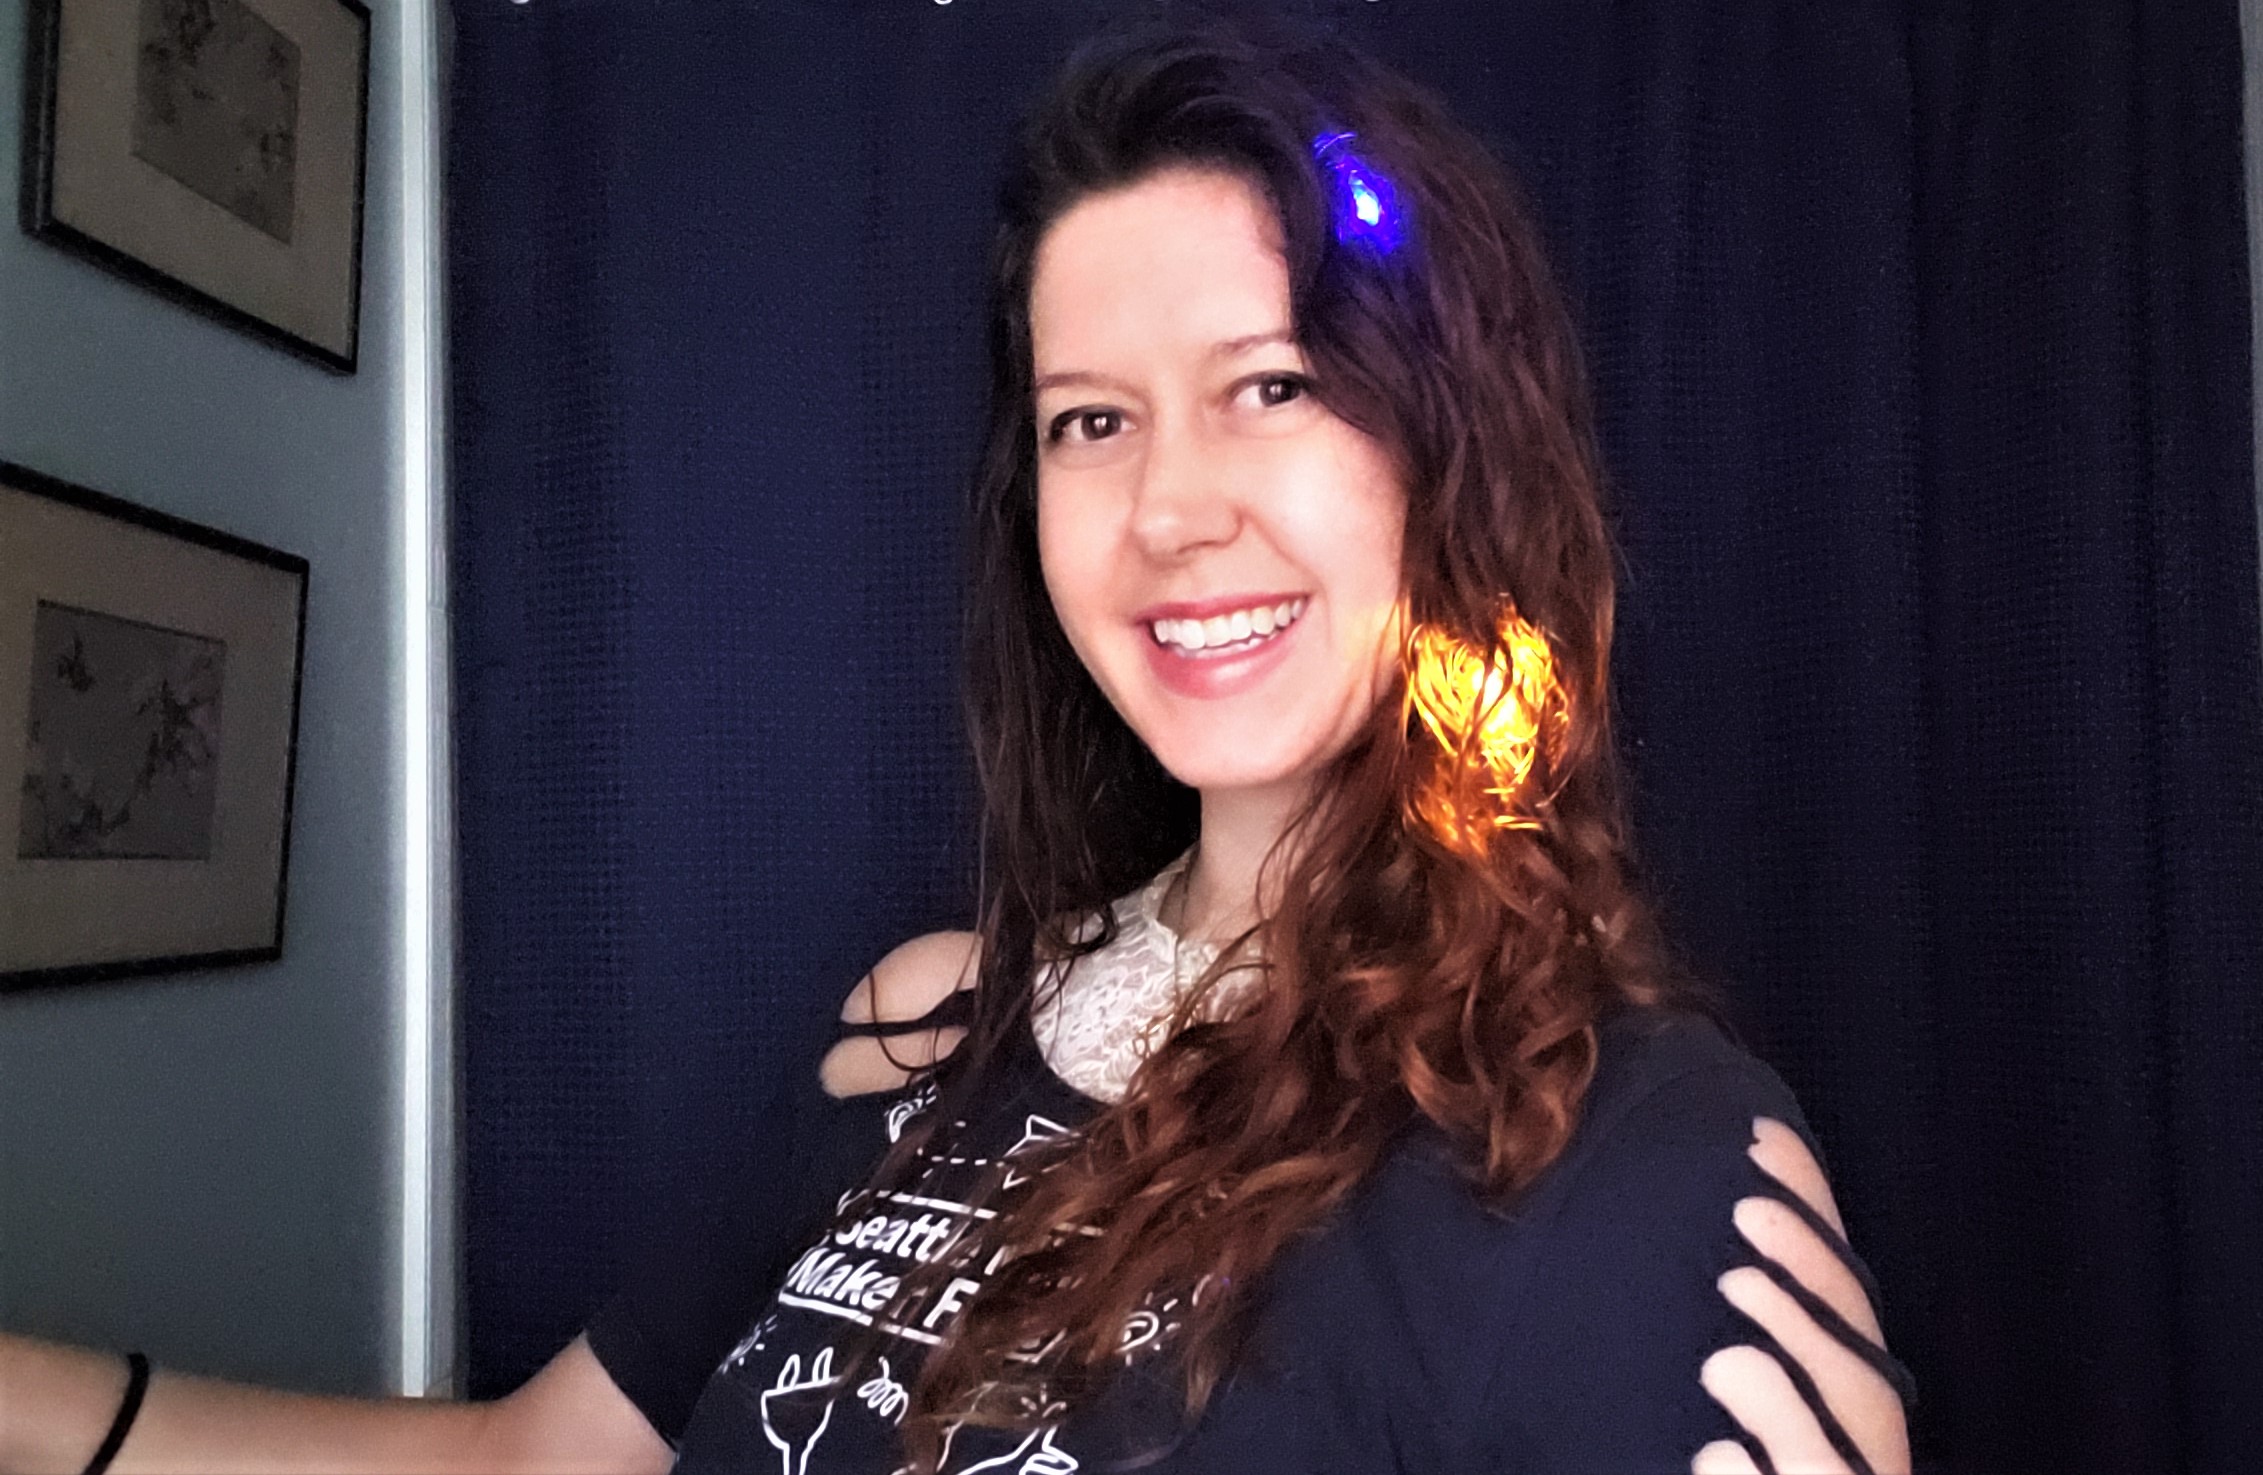
Build fabulous, futuristic, and adjustable wearable lights with just a few inexpensive (and deliverable) parts! Attach to to all sorts of accoutrements and swap out colors to match outfits/feelings/holidays/all the things!
Difficulty: Beginner+
Read time: 5 min
Build Time: 30 – 60 min
Cost: ~ $5
Materials

- One (1) coin cell battery
- One (1) coin cell battery holder with switch
- Two (or more) LEDs
- Snag a variety pack so you can swap out colors and types!
- You can even get super cool color changing LEDs, woo!
- Two (2) 100Ohm resistors
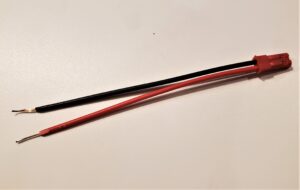
- Two (2) JST connectors (female ends only)
- Attachment mechanism
- Examples: bobby pin, hair clip, broach pin, safety pin, magnet, etc!
- Examples: bobby pin, hair clip, broach pin, safety pin, magnet, etc!
Tools
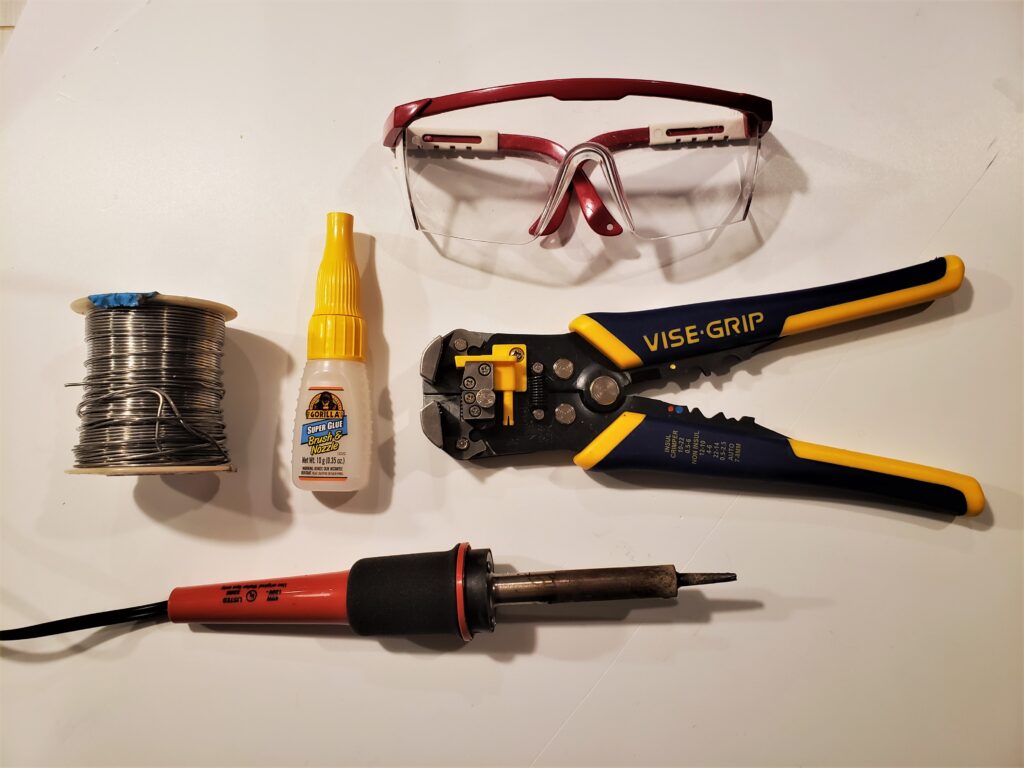
- Safety Goggles!
- Soldering iron and accessories*
- Waterproof epoxy or superglue
- Wire strippers
- Scissors will also work just be careful to avoid cutting the wire.
*Unable to solder? Follow instructions but instead of soldering, tightly wrap and twist bare wire connections together, then wrap tightly with conductive nylon fabric tape.
Setup!
- Turn on the soldering iron.
- Remove about 1/2″ (1cm) or the plastic coating on each of the female JST connectors.

- New to LEDs? Test ’em out!
- Grab your coin cell and one of your LEDs.
- With just those two pieces, explore how to make the LED light up!
- Hint: Read the coin cell battery. How many sides does the battery have? How many legs does the LED have?
Make the first connector!
For all steps, be sure the coin cell is NOT in the battery holder.
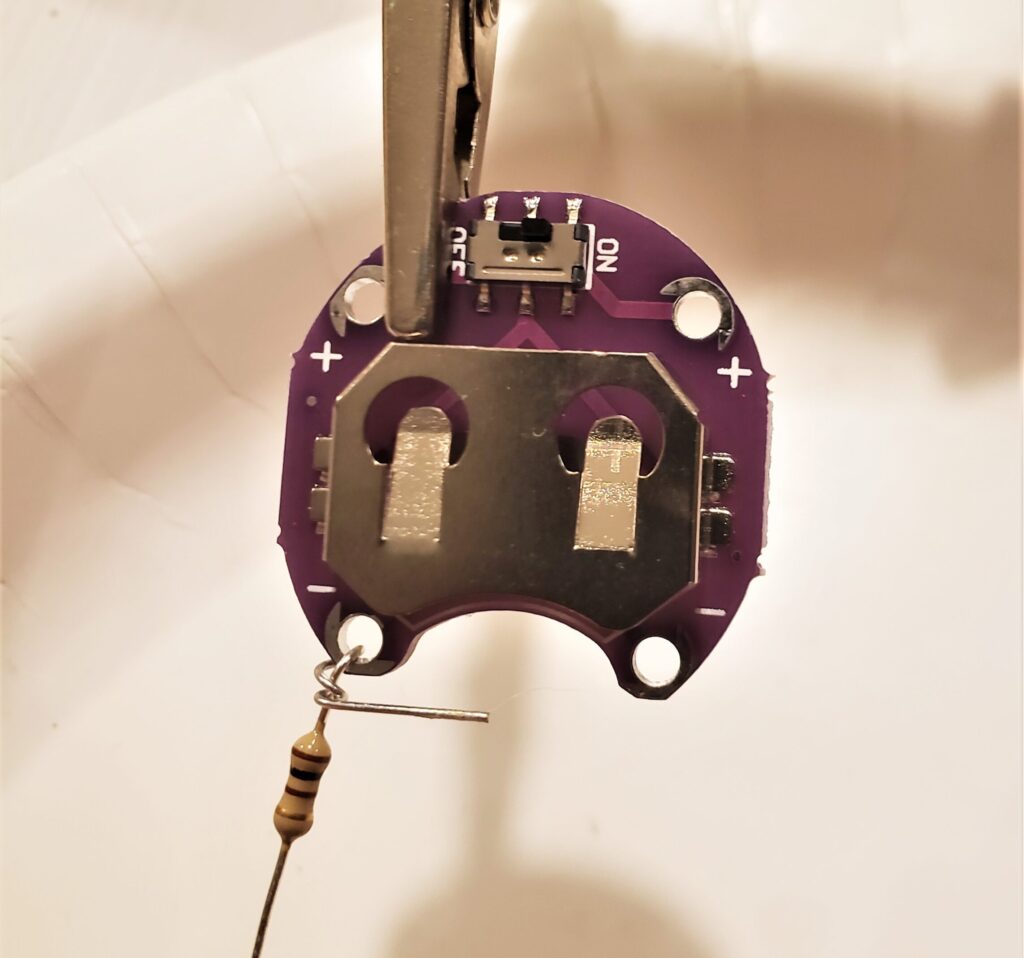
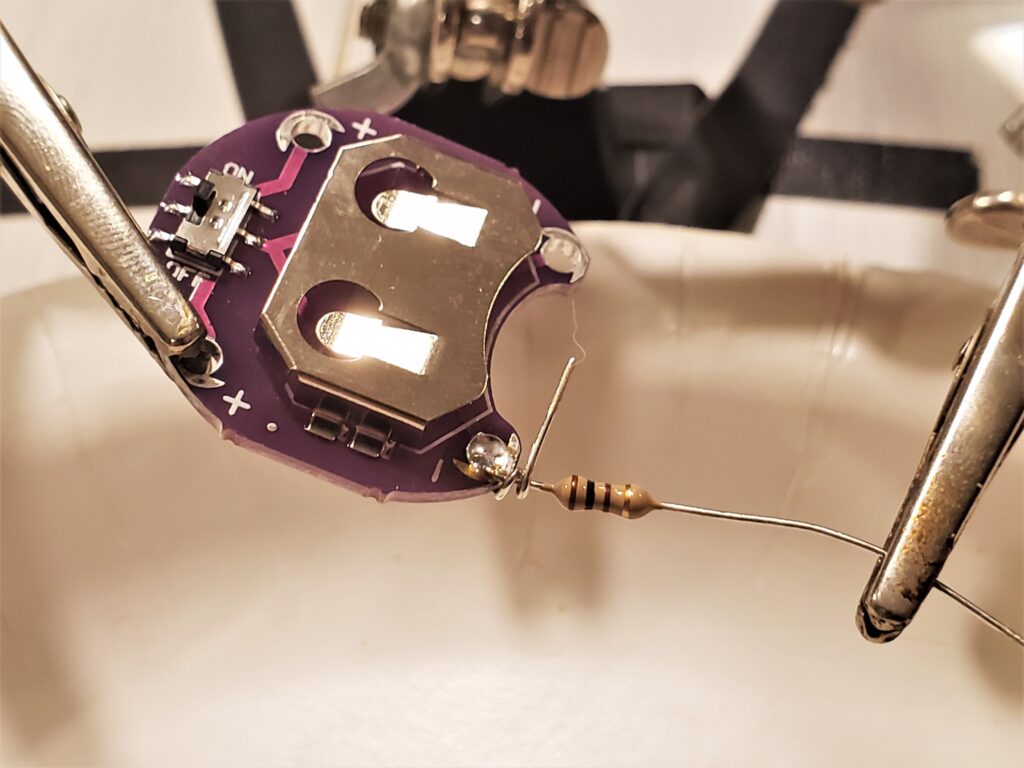
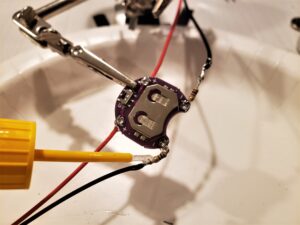
Step 1: Solder your first resistor to the negative ( – ) hole on the coin cell battery holder.
- With the switch facing you, use the negative hole on the left side of the holder.
- Pro Tip: Wrap the resistor wire around the hole, getting the resistor body as close to the hole as possible. Use the soldering iron to heat the joint for about 3 seconds, then add solder to fill in the hole.
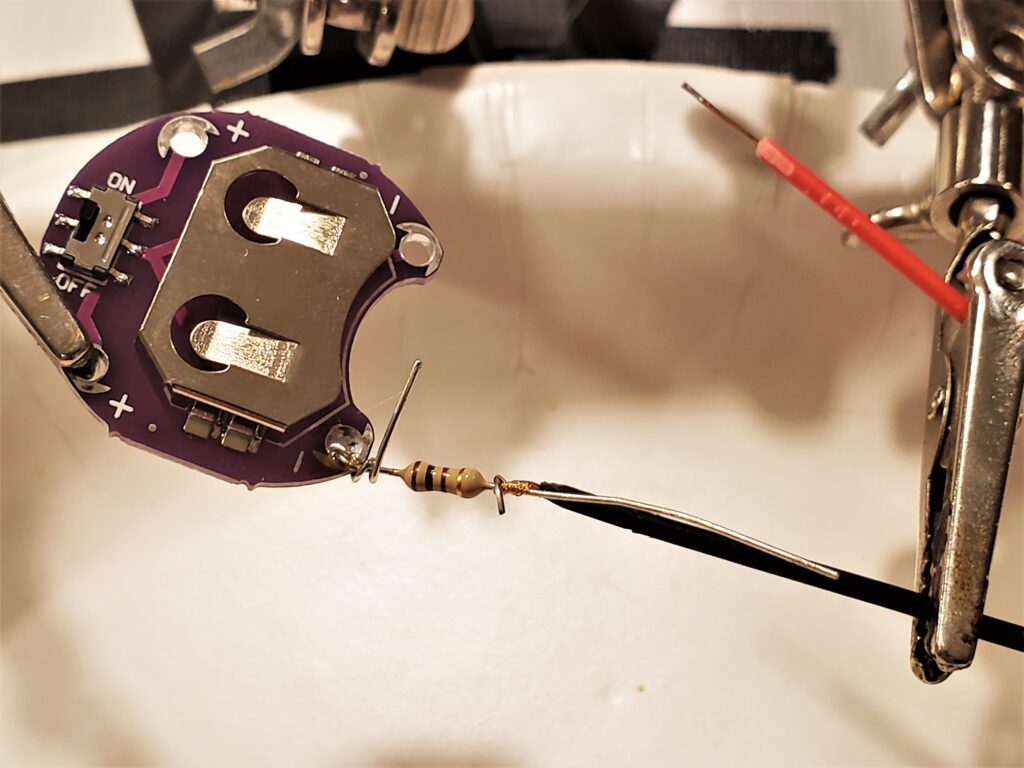
Step 2: Grab your first JST connector and solder the black wire to the other end of the resistor.
- Pro Tip: Wrap the JST connector bare wire around the resistor leg as close to the resistor body as possible.
Step 3: Solder the red JST connector wire to the positive ( + ) hole on the battery holder.
- With the switch facing you, use the positive hole on the left side of the holder.
- Pro Tip: Wrap the JST connector bare wire around the hole Use the soldering iron to heat the joint for about 3 seconds, then add solder to fill in the hole.
Make the second connector!
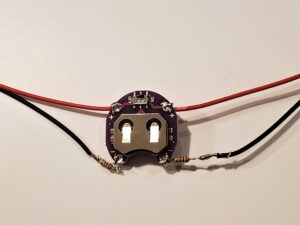
Repeat the same process as for the first light, but using the right-side holes on the battery holder.
More details:
For all steps, be sure the coin cell is NOT in the battery holder.
Step 1: Solder your second resistor to the negative ( – ) hole on the coin cell battery holder.
- With the switch facing you, use the negative hole on the right side of the holder.
- Pro Tip: Wrap the resistor wire around the hole, getting the resistor body as close to the hole as possible. Use the soldering iron to heat the joint for about 3 seconds, then add solder to fill in the hole.
Step 2: Grab your first JST connector and solder the black wire to the other end of the resistor.
- Pro Tip: Wrap the JST connector bare wire around the resistor leg as close to the resistor body as possible.
Step 3: Solder the red JST connector wire to the positive ( + ) hole on the battery holder.
- With the switch facing you, use the positive hole on the right side of the holder.
- Pro Tip: Wrap the JST connector bare wire around the hole Use the soldering iron to heat the joint for about 3 seconds, then add solder to fill in the hole.
Test and Secure Joints
Step 1: Trim any excess wire.
Step 2: Insert the coin cell battery into the holder and move the switch to the “ON” position.
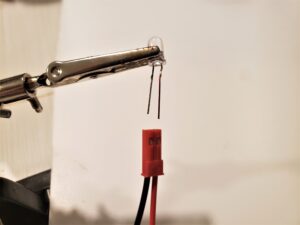
Step 3: Insert LEDs into the JST connectors so that the longer (positive) LED leg plugs into the red wire of the JST connector.
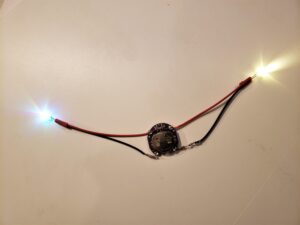
Step 4: Check to ensure that the LEDs light up! If it does, proceed to Step 4. If not, follow the troubleshooting guidelines below.
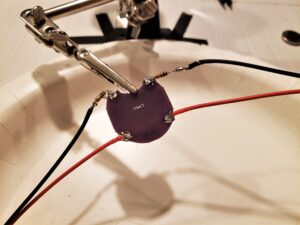
Step 5: Remove the battery, then thoroughly cover all exposed solder joints with epoxy or super glue and let dry in a safe, out-of-the-way spot. Remember to glue the back of the battery holder!
- Be sure to glue the connections between the JST connector and resistor. Coat the positive and negative solder holes, but DO NOT cover any other parts of the holder or it may be impossible to insert the battery or use the switch.
- Check the dry time for your glue (mine was about 60 minutes until fully dried). Be sure to avoid bumping or getting hair on your project, as it will be hard to remove after (as a dog owner this is a constant challenge!).
- Pro Tip: Use a fine-tipped brush or skewer to add the glue.
Troubleshooting:
- Check the power. The battery should be inserted so that the positive side (with the writing) is facing up.
- Double check the LEDs are inserted in the correct orientation: longer leg to positive (red) wire, shorter leg to negative (black) wire.
- Gently wiggle your solder connections. If you notice the LED flashes on, it is likely a poor solder connection.
- Remove the battery and add more solder to your joint.
- Check that the solder joints are not shorting the battery holder. If you feel the battery getting warm, this is likely the culprit
- Check that the solder is contained to the positive and negative holds ONLY. It should not be touching any other parts of the holder, especially any exposed metal.
Finish & Flaunt!


Finally, grab your attachment mechanism and, if needed, glue to the back of the battery holder and let dry (I used a magnet for mine so no glue necessary!). Insert your preferred LEDs and attach your light-up accessory to your clothes or hair for some futuristic flourish!
Going Further
- Sew somethin’ pretty to go over the lights!
- Aside from hair, explore different options for diffusing the LED light. Some quick, inexpensive options are ping pong balls, a dab of hot glue around the LED bulb, or white fabric.
- More lights!! Test before doing this as the brightness of the lights will change depending on whether you connect them in series or in parallel.
- Need more info on series or parallel? Learn more here!
- Add a dark detecting circuit so your lights only turn on in the daytime!
- You can harvest a dark detecting circuit from a solar path light.
- Or search online for the circuit!
Questions? Ideas? Let me know! I’d also love to see your finished creations, so please share!